
Big Sur Trailmap
in Smartphones
in Smartphones
updated: Jul 5, 2026
Note:
I have limited hiking experience with a smartphone,
since I usually use a GPS while hiking. Information presented here is based
upon experimentation with
GPS apps on my android phone and a friend's
iphone, so is likely incomplete. If you think something needs to
be added,
post to the Trailmap Forum
to educate me and I will add that information
to this webpage.
App map warning: Smartphone apps generally use OpenStreetMap or USFS derived maps, both giving incorrect or incomplete trail/camp locations in the Ventana/SilverPeak wilderness areas. So the focus here is on apps which can use the accurate Big Sur Trailmap data I provide. FYI: for Big Sur trails, all commercially-printed Big Sur maps are more accurate than those in smartphone apps.
Cell connectivity: much of Big Sur has no wireless phone reception, especially in the wilderness, so requires a GPS-enabled smartphone and software capable of off-line storage - all software described below has that capability, but some are easier to utilize.
Three ways of displaying Big Sur Trailmap
in a smartphone GPS app
use whichever best meets your needs: GPX or PDF or Tiles
in a smartphone GPS app
use whichever best meets your needs: GPX or PDF or Tiles
[gpx files updated: Nov 14]
Gaia screenshot
(click for larger view)
Many, but not all, phone GPS apps can import a GPX file to display lines ("tracks"), such as trails, and points ("waypoints"), such as camps. With such apps, you can add
Big Sur Trailmap lines and points, i.e. trails, camps, and water sources, by importing a single GPX files.
The GPX files provide all trailmap lines and points, adding stream crossings if multiple crossings of a stream (since GPSes can zoom in more than on-line maps).
The GPX files provide all trailmap lines and points, adding stream crossings if multiple crossings of a stream (since GPSes can zoom in more than on-line maps).
This method's advantages are:
• can be free (depending upon app)
• versions with and without trail conditions/closures available
• includes details text info for line/icon tap display
• allows high zoom levels (to max permitted by app)
• requires minimal storage [3 Mb]
This method's disadvantages are:
• may display trailmap line colors and points differently from on-line trailmap
(so losing info on trail/icon type/condition)
• some apps mix trailmap lines and points with other lines and points in the app
• some apps cannot display/hide all trailmap lines and points with single click
• updating may require deleting existing lines and points before exporting new trailmap GPX file
(depends upon whether app overwrites or re-names trails with same name)
Apps with GPX import:
• Gaia GPS (for android & iPhone - free for gpx-only usage)
Import Instructions: 'Import GPX' webpage
Note: trailmap line colors are preserved, but uses same icon for all points
(some Gaia users report that waypoint name information is not being displayed - it can be made to appear by simply "editing" the waypoint, the name then magically appearing)
Import Instructions: 'Import GPX' webpage
Note: trailmap line colors are preserved, but uses same icon for all points
(some Gaia users report that waypoint name information is not being displayed - it can be made to appear by simply "editing" the waypoint, the name then magically appearing)
• Backcountry Navigator (for android - "Pro" version = one-time $15 [Jan.2025])
Import Instructions: Section 4.e of manual
Note: uses same color for all imported lines, so much BigSurTrailmap info lost
Import Instructions: Section 4.e of manual
Note: uses same color for all imported lines, so much BigSurTrailmap info lost
• Guru Maps (for android & iPhone -"Pro" version for over 15 tracks/points = $22.50/year [Apr.2025])
Import Instructions: 'Import GPX' webpage
Note: uses same color/icon for all imported line/points, so much BigSurTrailmap info lost
Note: their California map includes 1.5Gb of 'Navigation Data', may need to delete to reduce storage burden
Import Instructions: 'Import GPX' webpage
Note: uses same color/icon for all imported line/points, so much BigSurTrailmap info lost
Note: their California map includes 1.5Gb of 'Navigation Data', may need to delete to reduce storage burden
• OruxMaps (for android - $5.50/yr [Jul.2026])
Import Instructions: in Tracks/Routes screen, use "Import/Download a Track" - see English Manual
[If you like another app, let me know and I will add it here.]
Import Instructions: in Tracks/Routes screen, use "Import/Download a Track" - see English Manual
Notes:
• GPX file size: 3.1Mb
• Both GPX files updated daily to match latest on-line maps.
• Line color ultimately set by the app - what you see may differ from GPX internally-specified color.
• Icon symbols use Garmin standard names - but those typically not recognized by apps, so all icons appear identical. 
• GPX downloads include lines/points from these Big Sur Trailmap GoogleEarth (kml) folders:
TRAILS, USE TRAILS, ROADS, LOST TRAILS, CAMPS, CAMPGROUNDS, USE CAMPS, LOST CAMPS, WATER, SUMMITS, POINTS OF INTEREST, PLACES, WATERFALLS
- plus stream crossing points for rivers/creeks crossed multiple times by same trail.
Not included are kml folders PANORAMAS, ROUTES, GEOGRAPHY.
GPX copyright notice:
The gpx file's
data license
restricts it to personal non-commerical use, e.g. it is not to be promulgated to
a public source such as AllTrails or OpenStreetMap or non-private CalTopo
[pdf files updated: Jul 15]
Avenza screenshot

(click for larger view)
Several phone GPS apps — notably Avenza — can display geospatial PDFs.
So I provide two geospatial PDF Trailmap files,
one including current trail conditions/closures (valid until conditions/closures change) and the other not.
Many find these apps simple to use and meet their need to see where they are on a map.
The PDF files provide all trailmap lines and points, adding mileage between intersections and stream crossings if multiple crossings of a stream (since GPSes can zoom in more than on-line maps).
The PDF files provide all trailmap lines and points, adding mileage between intersections and stream crossings if multiple crossings of a stream (since GPSes can zoom in more than on-line maps).
This method's advantages are:
• can be free (depending on app)
• trailmap displayed exactly (lines,icons,background ala the on-line trailmap)
• can add details text info for line/icon tap display
• trailmap can be easily enabled/disabled, with single click
• versions with and without trail conditions/closures available (but former only valid until conditions/closures change)
• requires moderate storage [33Mb]
This method's disadvantages are:
• limited zoom capability
[one map for all zoom levels means fewer effective zoom levels, since lines/icons just get larger/smaller when zooming]
Apps with GeoPDF import:
• Avenza Maps (for android and iPhone - free for 3 loaded maps, $35/yr for unlimited maps [Jan.2025])
• Gaia GPS (for android & iPhone - $60 yearly for off-line storage [Jan.2025] - note that downloaded maps require renewal for access)
note: "Trailmap Map Tiles in GPS App" section below provides a more sophisticated map for Gaia users, since zooming in brings in higher-resolution images
note: "Trailmap Map Tiles in GPS App" section below provides a more sophisticated map for Gaia users, since zooming in brings in higher-resolution images
• Caltopo (20/yr for off-line layers [Jan.2025])
•
Adobe Acrobat Reader (for android and iPhone - free)
but is not a GPS app as it cannot display your current location]
but is not a GPS app as it cannot display your current location]
Trailmap PDF downloads
What I use on my smartphone
[tiles updated: Jul 17]

Phone GPS apps, such as Google Maps, typically display maps produced by a map tile server, accessed via the internet.
(Tiles are small pieces of the map, covering different areas at different zoom levels.)
Normally only map tiles around the active location are kept ("cached") on the phone,
which saves memory - but when internet access is not available, only currently cached tiles can be viewed.
For wilderness use, the below apps circumvent
this problem with an "off-line map storage" capability,
allowing tiles to be downloaded and stored on the device so the map can still be displayed
when internet access is lost.
The tiles provide all trailmap lines and points, plus trail conditions, mileages between intersections, and stream crossings if multiple crossings of same stream (since GPSes can zoom in more than on-line maps).
(In addition to the below apps, these tiles can also be used as a background map in GIS programs such as ArcGIS and QGIS, imported as "XYZ Tiles" - see "Technical details".)
This method's advantages are:
• trailmap displayed exactly (lines,icons,background ala the on-line trailmap - displayed image varies with zoom level)
• trailmap can be easily enabled/disabled, with single click
• includes trail condition/closure info
This method's disadvantages are:
• image only - tapping on trail/icon will not display text info
• zoom limited by tile maximum (level 16 = 2.0 meters/pixel)
• must ensure needed tiles downloaded before using off-line
• requires much storage [440Mb]
[An alternative for these apps is in section Trailmap GPX File in GPS App]
Apps with "off-line map storage" feature:
• Gaia GPS (for android & iPhone - Premium version for off-line storage = $60/year [Jan.2025] - note that downloaded maps require renewal for access)
• BackCountry Navigator (for android - "Pro" version for off-line storage = one-time $12, "XE" version = $15/year [Jan.2025])
• Guru Maps (for android & iPhone - "Pro" version for "online maps" = $22.50/year [Apr.2025])
Note: their California map includes 1.5Gb of 'Navigation Data', may need to delete to reduce storage burden
Note: their California map includes 1.5Gb of 'Navigation Data', may need to delete to reduce storage burden
• OruxMaps (for android - $5.50/yr [Jul.2026])
[If you know of another GPS app which can use tiled maps, let me know and I will add that info here.]
General app info:
• The below instructions only add Big Sur Trailmap to the list of available map backgrounds - to use it as the actual displayed background layer requires additional steps to make it the active background, steps which of course depend on the app
• Big Sur Trailmap tiles only cover the Big Sur region (the area outside will be blank) and only zoom levels 6-16 will be displayed.
• Trailmap tiles display trail condition/closure information, as a color surrounding the trail line (see trail conditions webpage).
• Trailmap tiles display mileages between  icons (when over 0.2 mi).
• Trailmap tiles display stream crossing icons  for streams with multiple crossings.
Specific app info:
BackCountry Navigator has a "custom map" feature for displaying a user-specified tile map.
To add the Big Sur Trailmap, under the "Map Layers" icon, select "More Map Sources" and tap its 3-vertical-dot top-right menu to select "Custom Map Source".
Then tap "New Custom Map Source" and enter the following fields (tap and use keyboard):
Name: "Big Sur Trailmap" MinZoom: "6" MaxZoom: "16" TileType: "PNG" TileUpdate: "None"
Url: "https://bigsurtrailmap.net/TRAILMAP/TILES/{$z}/{$x}/{$y}.png" - then tap "Save". This will return to the "Custom Map Source" screen - tapping the newly added "Big Sur Trailmap" line and then "Use" will display
the Big Sur Trailmap (note: the alternative choice "Edit/View" allows you to check for typing errors, should there be a problem).
Note that tapping on the "Map Layers" icon will indicate that the "Online & Cached Tiles" selection is now
"Big Sur Trailmap". Also note that after switching to a different map, "Big Sur Trailmap" and other previously used maps are quickly available by tapping on the current map source on the "Map Layers" screen. To display when out of internet/phone service, you must
download the tiles to your phone (345Mb storage for all tiles) -
see the BCN's map download help page.
(Summary: with Big Sur Trailmap displayed as "Online & Cached Tiles", zoom out to show entire map area, tap "Layers" icon,
tap "Select Areas for Download", drag to create selection rectangle(s) covering map area, tap "Folder" icon, set "Max Zoom" 16,
tap "Save to new Named Map Folder", input "Big Sur Trailmap", tap "Create", tap "Begin Download", wait for download to be completed - note final 1% processing may
take ~10 mins, do not cancel prematurely). Remember that the displayed on-line map will always be up-to-date whereas the downloaded map will require updating to be current.
Gaia GPS users can add the Big Sur Trailmap to your "Layers"
by downloading then importing a TileJSON tile information file".
Be sure to note the folder on the mobile phone where it's being downloaded to! [The file name is "BigSurTrailmap.json"]
Then in Gaia go to the map page and click the "+" icon and then "Import" - navigate to the folder where the JSON file is,
then click on the file to import.
Alternatively, you may be able to import the file by using your devices "Files" app - clicking on the filename may bring up a list of apps which can import the file.
(Ignore any references to trails/POIs, which can also be loaded in this fashion.)
You should now see "BigSurTrailmap" in your "Layers" screen - touch to make it the displayed map.
(You can delete the downloaded file.)
To display when out of internet/phone service, you must
download the tiles to your phone (330Mb storage for all tiles) -
see Gaia's iOS map download help page or
Android map download help page.
Note: when choosing to display a "Saved" map, after pressing "Show on Map" a considerable delay can occur (~6min) before the map is displayed.
Remember that the displayed on-line map will always be up-to-date whereas the downloaded map will require updating to be current.
Guru Maps GPS users can add the Big Sur Trailmap
by downloading my "MS tile information file".
[The file name is "BigSurTrailmap.ms"]
After downloading, use your device's "Files" app to import the file into Guru Maps - in that app, clicking on the filename should bring up a list of apps which can import the file.
After importing, you should see "BigSurTrailmap Tiles" in Guru Maps' "Settings" > "Map Source" screen under "Online Maps" - touch to make it the displayed map, a "check" icon will appear.
(You can delete the downloaded file.)
To display when out of internet/phone service, you must follow Guru Map's "Caching online maps" instructions.
For a tile to be displayed off-line, it must have been previously used/displayed when on-line (which saves it) - since tiles cover different areas at different zoom levels, can be tricky to ensure this is done for all tiles wanted off-line. (Is more straight-forward in other apps.)
For more control over tile downloading, see the Guru Map's "Online Maps Settings".
OruxMaps can display maps from a tile server, including off-line by pre-loading onto the mobile phone.
To add Big Sur Trailmap tiles, after installation find directory oruxmaps/mapfiles on the memory card - after making a backup copy of its onlinemapsources.xml file,
use a text editor to insert (be careful!) this text into file onlinemapsources.xml,
just after the "<onlinemapsources>" tag and just before the
following "<onlinemapsource uid=..." tag. Big Sur Trailmap will then appear as a selection under "ONLINE" "LAYERS" "US".
Alternative to avoid editing: copy this 2018 version of onlinemapsources.xml with Big Sur Trailmap added
to that directory and re-name it as onlinemapsources.xml.
[Tested: Aug2018]
To display when out of internet/phone service, you must
download the tiles to your phone.
For more information, see the
English manual.
Remember that the displayed on-line map will always be up-to-date whereas the downloaded map will require updating to be current.
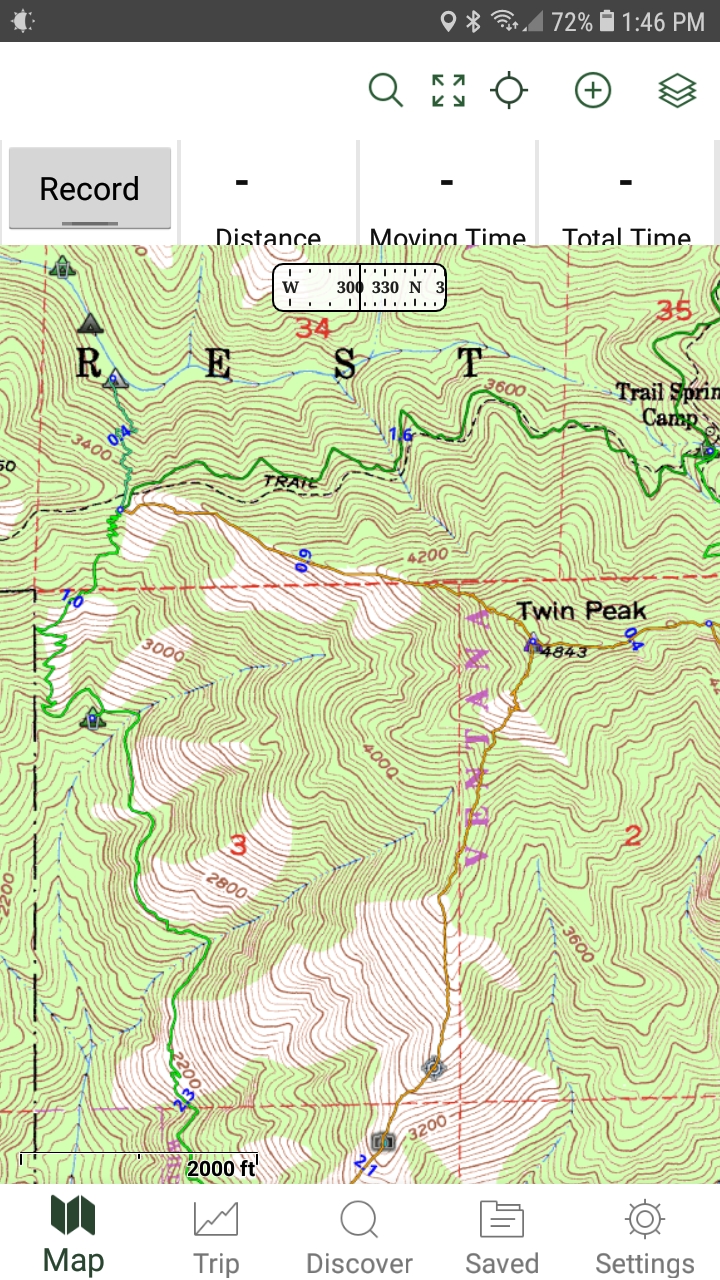
Example Tile:
To illustrate the high-resolution capability of these tiles,
below is the highest zoom tile (level 16) for Big Sur Station and the Pine Ridge Trail trailhead.

Interactive Tiles Sampler:
This link provides an interactive viewer to let you see how the tiled map will appear in your mobile phone app
(except the app will have its own tools, etc.) - you can zoom/move the map as an app would:
Stream Crossing Icons:
Some trails cross the same stream multiple times, sometimes in quick secession - for example, the Carmel River Trail crosses the Carmel River 27 times!
Since knowing whether the next crossing is near or far can be useful, for such trails I've added crossing icons  . But the icon must be small since if larger would show only a single icon at crossings which are very close together, negating their usefulness. So if hiking such trails,
you must display the tiles at their highest zoom level to effectively view the stream crossing points.
. But the icon must be small since if larger would show only a single icon at crossings which are very close together, negating their usefulness. So if hiking such trails,
you must display the tiles at their highest zoom level to effectively view the stream crossing points.
Technical details:
• Tiles are accessed at subdirectories of
https://bigsurtrailmap.net/TRAILMAP/TILES/, providing 256x256 pixel PNG tiles with
directory ordering "ZXY", Y increasing southward (i.e. GoogleMaps/OSM/XYZ format).
An example of the tile info needed for a app is: https://bigsurtrailmap.net/TRAILMAP/TILES/{$z}/{$x}/{$y}.png.
(Addendum: have now added links such that "Y increasing northward", ala the OSGeo TMS format, also works).
• Zoom levels are 6 through 16 (zoom6-13=100Kmap,zoom14-16=24Kmap).
• Bounds are 35.758° to 36.415° latitude and -121.874° to -121.162° longitude.
• The top-most tile is
https://bigsurtrailmap.net/TRAILMAP/TILES/6/10/25.png
• PNG image sizes have been reduced using optimization algorithms.
• Downloading complete tile set requires 440Mb of storage.
• Some apps can use a
• TileJSON tile information file for setup:
[click to download "BigSurTrailmap.json"]
[click to download "BigSurTrailmap.json"]
• MS tile information file for setup:
[click to download "BigSurTrailmap.ms"]
[click to download "BigSurTrailmap.ms"]
• Tiles are updated weekly using latest information.
Background map FYI
The PDF background map used at higher resolutions is the modern USGS "shaded terrain" National Map, which is the default for my on-line interactive maps,
rather than the venerable USGS quadrangle map. The modern USGS map has a cleaner and more attractive look, but fewer labels than the venerable quadrangle maps.
While it often shows incorrect "official" trail lines, those should be ignorable compared to the thicker, more obvious "trailmap' lines.
© The information and data on this webpage copyrighted by John W. (Jack) Glendening. Data license